Last Updated: April 2026
Photo restoration pricing has remained relatively stable, but AI-assisted restoration tools have slightly reduced costs for basic repairs while complex restorations still require skilled manual work.This guide reflects the latest pricing trends from professional restoration services in 2026.
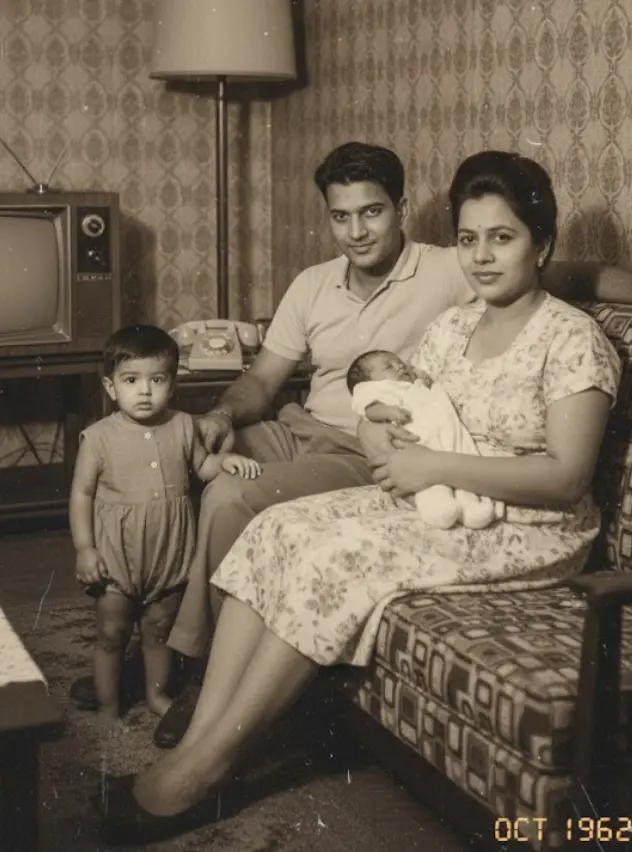
Preserving your family history doesn’t have to be a nightmare.
We understand the emotional connection you have to every single photograph. That’s why we’re cutting through the confusion to show you exactly what to expect.
We’ll cover everything from free AI tools to dedicated professional services. You’ll get a clear picture of what photo restoration actually costs in 2025 and, more importantly, how to get the results your memories deserve.
It’s simpler and more affordable than you think.
Why Does Professional Photo Restoration Cost So Much?
So, what exactly are you paying for when you hire a professional? Let’s break it down.
- Intense, Manual Labor. Meticulously repairing a photo by hand, pixel by pixel, takes serious time and skill.
- Specialized Artistic Talent. This isn’t about slapping on a filter. It requires a trained eye and deep knowledge of advanced editing techniques.
- High-End Tools. Professionals invest in top-of-the-line scanners, calibrated monitors, and expensive software subscriptions.
- Significant Time Commitment. Depending on the damage, a single photo can take hours—or even days—to restore properly. Professional services often have turnaround times of 2 to 5 days for this reason.
So, is it worth it? Absolutely.
You’re not just paying for a service. You’re investing in:
- Preserving your family’s legacy.
- Protecting irreplaceable memories.
- Gaining peace of mind knowing your photos are in expert hands.
If you’re weighing your options, our in-depth breakdown of DIY photo restoration vs. professional services can help you decide which route makes sense for your situation.
We built BringBack to provide more affordable options, but we also recognize the incredible value that skilled professionals bring to the table.
For severely damaged photos, it’s worth the investment to ensure those memories are preserved for generations.
How to Estimate Your Restoration Costs (Based on Damage)
The first step is figuring out how damaged your photo really is.
Think of it like taking your car to a mechanic; a small dent is different than a totaled engine.
Here’s a breakdown of common damage levels and how they affect pricing:
Minor Damage: The “Quick Fix”
- What it looks like: Minor scratches, dust spots, slight fading, or small cracks. The key details are still clear.
- Cost Range: Usually falls into the $15 to $30 range for professional work.
- DIY Possibility: Often easily fixed with one-click AI restoration tools. These tools are often free or very low-cost.
Moderate Damage: Noticeable Imperfections
- What it looks like: More significant imperfections, visible fading, or moderate tears that might obscure some details.
- Cost Range: Expect to pay between $30 and $50.
- The Goal: Clearer, sharper images with natural-looking details restored by an experienced hand.
Severe Damage: Major Reconstruction
- What it looks like: Major tears, heavy water damage, missing pieces, or blurry, unrecognizable faces.
- Cost Range: This is where prices typically start at $50 and go up.
- Pro Tip: For these photos, look for services that emphasize “museum-quality” restoration crafted by “real artists.”
Water Damage: A Tricky Beast
- What it looks like: Staining, warping, discoloration, or image loss in certain areas.
- Why it’s costly: Water damage is unpredictable and requires specialized techniques to fix correctly.
- Expect: Costs similar to moderate or severe damage, depending on the extent.
Water damage is one of the trickiest problems in photo preservation. To understand exactly what’s involved in the repair process, read our guide on fixing water-damaged photos using AI.
Remember: These are just estimates. The best way to get an accurate quote is to share your photo with a restoration service. We can quickly assess the damage and give you a clear idea of what it will take to bring your memories back.
AI vs. Manual Restoration: Which is Right for You?
This is the big question: should you use an AI tool or hire a skilled human expert?
Let’s break down the pros and cons.
AI Photo Restoration: Speed and Affordability
- The Good:
- Insanely Fast: AI can often restore photos in seconds.
- Low Cost: Many AI tools are free or offer very affordable plans.
- Easy to Use: Just upload your photo and let the AI work. We built BringBack to be incredibly user-friendly!
- The Not-So-Good:
- Quality Limitations: AI can struggle with complex damage or fine details.
- Generic Results: It might apply the same “fix” to every photo, losing the unique character of the original.
- Hidden Costs: Free versions often have watermarks or daily limits, pushing you to pay for advanced features.
Before choosing a free tool, it’s worth understanding the real differences between free and paid photo restoration apps — the gap in quality is bigger than most people expect.
When is AI “Good Enough?”
For minor damage like scratches, dust, and slight fading, AI is a fantastic option. Our BringBack AI tool works wonders on photos with minor blemishes, delivering impressive results in seconds.
Manual Photo Restoration: Precision and Expertise
- The Good:
- Unmatched Quality: A skilled artist can meticulously repair even the most severe damage.
- Customized Approach: Every photo gets individual attention and a tailored restoration plan.
- Artistic Touch: Real artists can restore details, textures, and colors with incredible accuracy.
- The Not-So-Good:
- Higher Cost: Manual restoration is significantly more expensive than AI.
- Longer Turnaround: Expect to wait days, or even weeks, for a professionally restored photo.
When is a Professional Necessary?
For severe damage—major tears, missing pieces, or heavy water damage—you need a human touch. For truly irreplaceable photos, the investment is absolutely worth it.
AI can guess what a blurry face looks like, but a skilled artist can use reference photos and artistic techniques to truly bring that person back to life.
If you’re unsure, start with an AI tool to see if it meets your needs. If not, seek out a professional. Here’s a fascinating look at how AI reconstructs missing and torn pieces of a photo.
What Actually Determines Photo Restoration Price
The cost of restoring a photo depends on a few key factors. Understanding these helps you estimate pricing before requesting a quote.
- Level of Damage: Small scratches cost less than torn or missing sections.
- Face Restoration Complexity: Fixing faces requires manual reconstruction and is often the most expensive part.
- Image Resolution: Low-resolution scans require additional reconstruction work.
- Color Restoration or Colorization: Restoring natural colors adds time and cost.
- Number of Photos: Bulk restoration usually reduces the price per photo.
- Turnaround Time: Rush delivery often increases cost by 25–50%.
Understanding Professional Photo Restoration Pricing Tiers
Photo restoration services often categorize their pricing into tiers. Understanding them will help you estimate the cost.
Basic Restoration: Simple Touch-Ups ($15 – $30)
- What it includes: Removing scratches, dust, minor cracks, and basic brightening.
- Best for: Photos that are 90% perfect and just need a little help to shine.
- Example: A photo with a few surface scratches and slightly faded colors. Basic restoration makes those imperfections disappear and boosts the vibrancy.
Moderate Restoration: Addressing Noticeable Damage ($30 – $50)
- What it includes: Fixing more significant damage, removing water spots, and restoring sharpness to key details.
- Best for: Photos with visible flaws that obscure parts of the image.
- Example: A photo with a visible crease across someone’s face. Moderate restoration would repair the crease and sharpen the facial features.
Advanced Restoration: Major Reconstruction ($50+)
- What it includes: Reconstructing missing pieces, fixing heavily damaged faces (often using reference photos), and repairing severe water damage.
- Best for: Photos that seem damaged beyond repair.
- Example: A photo torn in half with missing sections. Advanced restoration pieces it back together, recreating what was lost. This is where the investment brings back memories you thought were gone forever.
How Competitors Price Their Services:
- Damaged Photo Restoration: Offers tiers at $25, $45, and $60 per picture.
- Forever Studios: Prices their restoration at $35 per image.
Keep in Mind: These are just examples. The final cost will always depend on the service and the specific damage to your photo.
Want to Try DIY? Your Best Options Beyond AI
Feeling adventurous? You don’t need to be a Photoshop guru to get decent results on your own.
Several software options can empower you to breathe new life into your old photos.
- GIMP: A free and surprisingly powerful image editor. It has a learning curve, but it’s packed with features.
- Photoshop Elements: A more user-friendly version of Photoshop designed for hobbyists. It’s a great balance of power and ease of use.
- Affinity Photo: A professional-grade editor and a fantastic alternative to a full Photoshop subscription.
Essential DIY Techniques to Learn:
- Cloning: Copying pixels from a clean area to cover a blemish or small crack.
- Healing Brush: Similar to cloning, but it intelligently blends the copied pixels with the surrounding area for a more natural look. Perfect for dust spots.
- Color Correction: Adjusting brightness, contrast, and saturation can dramatically improve faded photos.
YouTube is your best friend! Search for tutorials on “GIMP photo restoration” or “Photoshop Elements healing brush” to find step-by-step guides.
Just remember, DIY has its limits. For severely damaged or truly irreplaceable memories, a professional is still your best bet.
How to Choose a Reputable Photo Restoration Service
If you decide to hire a pro, how do you choose the right one?
Use this checklist to guide you:
- Review their portfolio. Look for “before and after” examples of photos with damage similar to yours. Do the restored photos look natural and realistic?
- Read client reviews. Check Google, Yelp, and other sites. Look for patterns. Do people consistently praise the quality? Are there recurring complaints?
- Ask about satisfaction guarantees. A reputable service should be willing to work with you until you are happy with the results. What happens if you don’t like it?
- Demand clear communication. The service should be upfront about pricing and their process. Avoid services that are vague or evasive.
Red Flags to Watch For:
- Unrealistic promises: Be wary of anyone promising to “magically” restore a photo that’s completely destroyed.
- Lack of transparency: If they won’t provide clear pricing or show you their work, run.
- Pushy sales tactics: A great service lets its work speak for itself.
Take your time, do your research, and trust your gut.
Photo Restoration Cost Trends in 2026
In 2026, pricing for photo restoration services has stabilized compared to the sharp increases seen between 2022 and 2024. However, several new trends are shaping the industry:
- AI-assisted restoration is reducing costs for basic fixes
- High-resolution archival restoration remains premium-priced
- Demand for memorial and genealogy photo restoration continues to grow
- Online restoration services are now more common than local studios
A Question of Ethics: How Much Should a Photo Be ‘Corrected’?
As we restore these images, we have to ask: how far is too far?
Where is the line between restoration and rewriting history?
It’s about preserving authenticity. Here are a few ways to think about it:
- The “Purist” Approach: Focus on minimal intervention. Correct only the worst damage and preserve the original image’s character, flaws and all.
- The “Realist” Approach: Aim for a “like new” appearance. Address all visible damage to create a visually appealing image, even if it requires some alteration.
- The “Historian” Approach: Prioritize historical accuracy above all else. Any alterations must be consistent with the historical record.
Altering a photo can change its meaning and create a false impression of the past. It’s crucial to be transparent about the extent of the restoration.
Our Stance at BringBack:
We believe in transparency. We always provide “before” and “after” comparisons and explain the restoration process.
Ultimately, the final decision rests with you. We’re here to help you achieve your vision while remaining mindful of the ethics.
Ask yourself: What’s more important—historical accuracy or visual appeal? The answer will guide your decision.
How to Protect Your Restored Photos Forever
Once your photos are restored, protecting them for the long haul is key.
- Choose the right file format. Use TIFF or PNG. They are “lossless” formats that preserve every pixel of quality. Avoid JPEG for long-term storage, as it compresses images and loses detail.
- Use the “3-2-1” backup rule. Keep 3 copies of your photos, on 2 different types of media (like a hard drive and cloud storage), with 1 copy stored offsite.
- Tag your photos with metadata. Add info like dates, locations, and people’s names. This makes it easy to find specific photos later.
- Regularly check your storage. Hard drives fail. Cloud services change. Make sure you can still access your files every year or two.
Follow these tips, and you can rest easy knowing your digital memories are safe and secure.
Does Your Location Affect Restoration Prices?
Generally, geographic location doesn’t drastically change the cost of photo restoration, especially for online services.
Online services have standardized pricing, making your location irrelevant.
Local, in-person studios might have slight variations. A studio in a major city with a high cost of living may charge more than one in a small town.
Bottom line: Don’t worry about it too much. Shop around online to get a baseline price, then compare that with any local options you’re considering.
BringBack: A Simpler, More Affordable Way to Save Your Memories
At BringBack, we believe preserving your family history should be simple, affordable, and private.
We built our platform as an alternative to expensive, time-consuming professional services.
Our AI restores your photos with just one click. It’s incredibly easy to use, even if you’re not tech-savvy.
What makes BringBack special:
- One-Click AI Restoration: Our advanced AI automatically removes scratches, dust, and fading.
- Photo Animation: Bring your still photos to life with realistic, subtle motion.
- Affordable Pricing: We offer simple plans to fit any budget.
- Privacy First: Your photos are yours. We prioritize their security.
Choose the Plan That’s Right for You:
- Starter Plan: Perfect for trying out BringBack and restoring a few cherished photos.
- Pro Plan: Ideal for restoring a larger personal collection of photos.
- Family Plan: The best value for families who want to share the joy of restored memories together.
Consider BringBack your first step.
See what our AI can do in seconds. If you love the results, great! If your photo needs more intensive work, you can always explore professional services.
We designed BringBack to bridge the gap between costly manual restoration and basic DIY tools, empowering you to preserve your family history without breaking the bank.