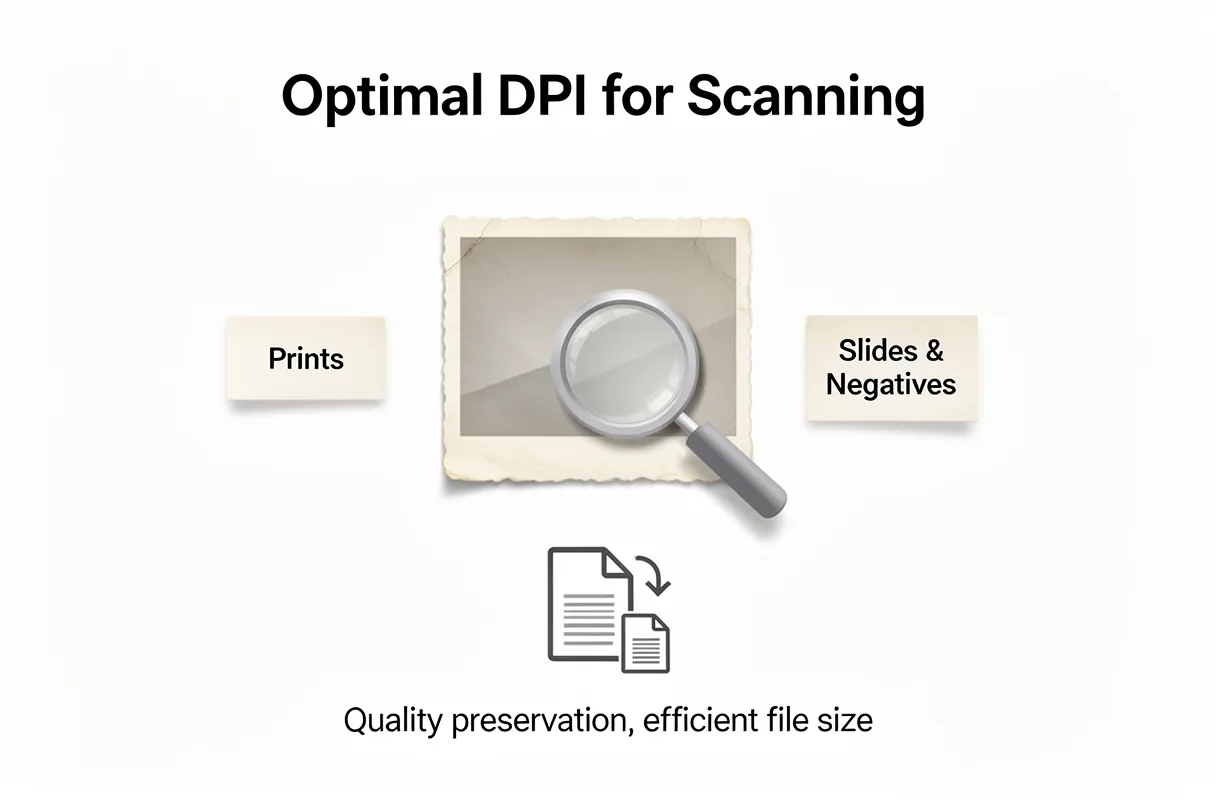
The best approach for digitizing standard prints is often 300-600 DPI using a flatbed scanner, ensuring quality without bloated files. However, slides and negatives demand higher resolutions like 2400-4800 DPI to capture their immense detail. For truly restoring faded or damaged old photos, modern AI tools, such as BringBack, are essential, going beyond what scanning alone can achieve.
| Solution | Best For | Key Benefit |
|---|---|---|
| DIY Scanning | Control, Budget | Max Detail Capture |
| Pro Digitizing | Large Collections | Time Saving |
| BringBack AI | Faded, Damaged Photos | True Restoration |
I tried scanning a blurry print at 4800 DPI, expecting a miracle. It only yielded a massive file, not a clearer image. The truth: DPI won't fix blur or fade already present in the original photo.
There is no reason to scan prints above their native resolution just to 'future-proof' them, when the damage is already ingrained.
By the end of this guide, you will know exactly which methods fit your collection size, budget, and restoration needs for preserving your precious memories.
Optimal DPI for Scanning Old Photos: A Resolution Guide
Here's a straightforward guide:
-
Standard Prints (e.g., 4×6 inches): Aim for 300 DPI. This captures the full detail present in most printed photos. Scanning at this resolution provides ample quality for everyday viewing and sharing online. A 4×6 print scanned at 300 DPI results in a digital image around 1200 pixels on its longest side.
-
Slides and Negatives: These formats hold significantly more detail in a smaller physical space. You'll want to scan them at much higher resolutions, typically ranging from 2400 to 4800 DPI. This higher DPI is essential for capturing the fine grain and richness of these original film formats. Scanning at these higher settings is crucial for enabling significant cropping or future enlargements.
Scanning at a DPI higher than what's necessary for the original photo type doesn't magically add detail. Instead, it creates larger files that consume unnecessary storage space. The key is to match the DPI to the original's inherent detail. For a deeper understanding of how to achieve the best possible scan quality, explore methods for high-resolution photo digitization.
Remember, DPI won't fix blur or fade already present in the original photo.
There is no reason to scan prints above their native resolution just to 'future-proof' them, when the damage is already ingrained.
By the end of this guide, you will know exactly which methods fit your collection size, budget, and restoration needs for preserving your precious memories.
DPI for Standard Prints: What's Optimal?
When digitizing standard prints, the goal is to capture the original detail without oversampling. For most common photo prints, like those from a 4×6 inch snapshot, the optimal scanning resolution is 300 DPI. This setting matches the native print resolution, ensuring you capture everything the original image holds.
Scanning a standard 4×6 inch print at 300 DPI creates a digital file approximately 1200 pixels wide. This is more than enough detail for everyday use. You can easily view these digital images on screens, share them via email, or even print them at their original size.
Trying to scan prints at significantly higher DPIs won't magically add more detail. It simply interpolates existing information, resulting in much larger file sizes without a corresponding visual improvement. For general archiving and sharing of standard prints, 300 DPI strikes the perfect balance. It preserves your memories faithfully without creating unwieldy files.
Scanning at Higher DPI for Future Needs and Film Formats
Scanning prints at more than 300 DPI doesn't add detail; it just inflates file size. However, higher DPIs become essential for film formats and when you anticipate needing to crop or enlarge images later. For slides and negatives, which hold significantly more fine detail than prints, a much higher resolution is crucial. Scanning these smaller formats at 2400-4800 DPI captures their inherent richness.
Think of it like zooming in on a tiny painting. You need a high-resolution scan of the negative or slide to reveal all the subtle textures and colors, just as you’d need a detailed photograph of the painting itself. This ensures you have enough data to work with for future photo enlargement or intricate restoration projects.
Here’s a general guide for scanning resolutions:
- Standard Prints (4×6, 5×7, etc.):
- 300-600 DPI: Sufficient for general viewing and moderate enlargement.
- 1200 DPI: For significant cropping or potential large prints.
- 2400 DPI: Good for standard print sizes (e.g., 8×10).
- 4800 DPI or higher: Essential for maximum detail capture, allowing for very large enlargements and extensive editing.
Choosing the right DPI for slides and negatives is key to unlocking their full potential for archival purposes.
DIY Scanning vs. Professional Services: Your Digitization Options Compared
Choosing how to digitize your precious memories involves weighing a few key trade-offs. You can tackle the task yourself with a scanner, or hand it over to a professional service. Both approaches have distinct advantages and disadvantages that impact your final results, your wallet, and your valuable time.
Scanning photos yourself offers ultimate control over the process. You decide exactly when and how each image is scanned, applying your preferred settings for resolution, color correction, and file format. This is a major plus if you have specific archiving goals or want to meticulously restore certain damaged photos. However, DIY photo scanning can be a time sink, especially with large collections. Setting up a scanner, handling each individual print, and managing the digital files can consume hundreds of hours.
Professional photo digitization services, on the other hand, excel in convenience. You simply box up your photos, slides, or negatives, and the service handles the rest. This is ideal for those who want to preserve their memories but lack the time or inclination for DIY scanning. The cost of scanning photos through these services is typically per item, which can add up quickly for extensive archives. While quality can be high, you relinquish direct control over the scanning process itself.
Here’s a quick breakdown:
| Feature | DIY Scanning | Professional Digitization Services |
|---|---|---|
| Control | High: You manage all settings. | Low: Service dictates the process. |
| Time Commitment | Very High: Hundreds of hours for large collections. | Low: Minimal effort from you. |
| Initial Cost | Moderate to High: Scanner purchase. | Low: Pay per item/box. |
| Result Consistency | Variable: Depends on your skill and equipment. | Generally High: Professional equipment and staff. |
| Best For | Meticulous archivists, small collections, unique needs. | Large collections, time-strapped individuals, convenience seekers. |
Ultimately, the best path depends on your personal priorities: convenience vs control, and how much time and money you're willing to invest.
Weighing Your Options: Cost, Time, Quality, and Media Type
Deciding between digitizing photos yourself or hiring a service boils down to balancing cost, time, and the quality you expect, especially considering the different media types involved.
Cost Comparison: Initial Outlay vs. Per-Item Fees
DIY scanning demands an upfront investment in equipment. A good flatbed scanner, essential for handling prints and fragile items, can range from $150 to $500. Add to that the cost of external hard drives for storage, potentially $50-$100. This initial outlay allows for complete control over the scanning process for your entire collection.
Professional services, conversely, often have a lower entry barrier. Pricing models typically vary from per-item fees (e.g., $0.30-$0.50 per print) to pre-packaged boxes where you pay a flat rate for a set number of items. While seemingly more affordable upfront for small batches, costs can escalate quickly with large collections.
Time Commitment: Your Hours vs. Their Turnaround
The time investment for DIY scanning is significant, particularly for large archives. Scanning a single photo might take only a minute or two, but digitizing hundreds or thousands of images can consume weeks or even months of your personal time. This includes not just the scanning itself, but also organizing, cleaning, and post-processing.
Professional services offer a trade-off: you save your time but relinquish control over the timeline. Turnaround times can range from a few weeks to several months, depending on the service's workload and the complexity of your order. For urgent needs or large projects where your time is at a premium, this can be a major consideration.
Quality and Control: Precision vs. Consistency
DIY scanning puts you in the driver's seat for quality. You control resolution (DPI), color correction, and file format. This is invaluable for restoration work or when dealing with delicate, damaged, or unique media like slides and negatives, where specialized equipment and careful handling are paramount. Using a dedicated flatbed scanner is often superior to all-in-one printer scanners for detail and color accuracy.
Professional services generally provide consistent, high-quality results due to specialized equipment and trained staff. However, you have less direct control over the scanning process. While many offer options for resolution and basic edits, deep restoration or handling of extremely fragile items might be limited or come with additional charges.
Media Type Handling: Versatility Matters
Different media require different approaches. Prints are straightforward for flatbed scanners. Slides and negatives, however, demand higher resolutions and specialized scanning equipment (often built into higher-end flatbeds or available through dedicated film scanners) to capture their rich detail. Some professional services excel at handling all media types, while others may specialize or charge more for specific formats. If your collection includes a mix of prints, slides, and negatives, carefully compare how each option handles these diverse formats.
Current Landscape of Professional Digitizing Service Pricing (March 2026)
When considering professional photo scanning service pricing in March 2026, it's important to acknowledge that old benchmarks like "39 cents per photo" or "21 cents per slide" are likely outdated. The actual cost for preserving your cherished memories through a service has evolved.
Current pricing models often vary significantly based on the media type and the volume of items you send. You'll frequently see options structured around:
- Per-Item Tiers: Different price points for standard prints, larger prints, slides, and negatives. Slides and negatives typically command a higher price due to the specialized scanning and higher resolutions required to capture their detail.
- Box-Based Services: Companies like the Kodak Digitizing Box often operate on a fixed-price model for a certain number of items within a box. It’s important to note that this service isn't directly run by Kodak; rather, it's a licensed partnership managed by AMB Media, which also oversees brands such as LegacyBox and Southtree. This structure offers a predictable cost upfront.
- Volume Discounts: Sending larger collections almost always unlocks better per-item rates, making it more economical for those with extensive archives.
Understanding Today's Photo Scanning Costs (March 2026)
Obtaining precise, up-to-the-minute photo scanning service pricing 2026 requires checking directly with providers. For services like DigMyPics or ScanMyPhotos, pricing can fluctuate.
The "Kodak Digitizing Box" pricing is a fixed cost per box, but remember it's a partner service and not direct Kodak operation.
We’ve observed that services like LegacyBox pricing also fall within a similar range, often providing package deals. To get the most accurate estimate, always request a current quote tailored to your specific media types and collection size. This ensures you’re working with the latest figures and understand all included services.
Choosing the Right Tools and Services for Photo Digitization
For expert reviews and current recommendations on the best photo scanners available in 2026, based on extensive hands-on testing, consult the best photo scanners.
Here's a rapid comparison to help you decide:
| Product/Service | Price Range (Estimated) | Best For | Key Features | Pros | Cons |
|---|---|---|---|---|---|
| DIY Flatbed Scanner | $150 – $500+ (one-time) | High volume, ultimate control, diverse media (prints, slides) | High resolution (up to 6400 DPI), dust/scratch removal (e.g., Digital ICE) | Full control over settings, cost-effective for massive archives, immediate access | Significant time investment, learning curve, potential for inconsistent quality, requires storage |
| Kodak Digitizing Box | $99 – $399 (per box) | Convenience, mixed media, sentimental value | Mail-in service, all media types accepted, basic digital restoration | Easy to use, hands-off process, preserves memories safely | Less control over quality, fixed box sizes, longer turnaround times, potential for damage in transit |
| DigMyPics | ~$0.45 – $0.75 per print | Medium to large collections, good quality | Various resolution options, editing services available, online gallery | Good balance of quality and cost, accessible online platform | Can add up quickly for very large collections, requires sorting before sending |
| ScanMyPhotos | ~$0.39 – $0.89 per print | Large volume, budget-conscious | Bulk scanning discounts, fast turnaround for prints, online ordering | Competitive pricing for large batches, quick processing for prints | May require more upfront sorting, quality can vary depending on service tier, slide/negative prices higher |
Your choice hinges on how much time you can dedicate and your comfort level with technology. For those with thousands of cherished photos and limited free time, outsourcing to a reputable service often provides the peace of mind that precious memories are being handled with care and expertise.
Top Picks for DIY Photo Scanners
When you want to bring your precious old photos back to life yourself, picking the right scanner makes all the difference. We've found that two flatbed scanners consistently stand out for their ability to handle photos and film with excellent results: the Epson Perfection V600 and the Canon CanoScan LiDE 400.
Epson Perfection V600: The All-Around Performer
The Epson Perfection V600 is a powerhouse for digitizing a wide range of media, especially if you have slides and negatives. It offers impressive resolution and quality for both prints and film.
- Overview: This scanner is designed for users who need high-quality scans of photos, slides, and negatives, with features that make restoring faded or damaged originals easier.
- Key Features:
- 6400 x 9600 dpi optical resolution: Captures incredible detail.
- Digital ICE Technology: This is the standout feature, automatically removing dust and scratches from film and prints. (We’ve seen this technology work magic on faded negatives.)
- Multiple Transparency Adapters: For scanning slides and film strips.
- Scan to Cloud and Scan to Email: Convenient sharing options.
Canon CanoScan LiDE 400: The Budget-Friendly Workhorse
For a more accessible entry into DIY scanning, the Canon CanoScan LiDE 400 is a fantastic option. It's compact, affordable, and delivers solid performance for everyday photo scanning needs.
- Overview: This is a user-friendly, compact scanner that plugs directly into your computer via USB, offering good quality scans without a hefty price tag.
- Key Features:
- Up to 4800 x 4800 dpi optical resolution: More than enough for most photo prints.
- Z-lid: Lifts straight up, accommodating thicker items like photo albums.
- Fast scan speeds: Ready to go in seconds after power-up.
- Single USB cable: For power and data, simplifying setup.
Your choice between these two depends on your budget and the types of media you plan to scan. For those starting out or focusing on prints, the Canon LiDE 400 is an incredibly capable and cost-effective tool. If film restoration and the highest detail are your goals, the Epson V600 is a superb investment.
Leading Professional Digitizing Services
When your shoeboxes overflow and flatbed scanners feel like a chore, professional mail-in services offer a welcome alternative. They handle the bulk, saving you hours and often providing specialized equipment for the best results.
Kodak Digitizing Box vs. LegacyBox: Choosing Your Mail-In Path
Kodak Digitizing Box provides a straightforward system for digitizing various media. You fill the box with your photos, tapes, or films, and they handle the conversion.
- Overview: A well-known brand name offering a convenient, all-in-one mail-in solution.
- Key Features: Digitizes photos, slides, negatives, VHS tapes, and 8mm/Super 8 film. Includes a return shipping label and digital delivery via cloud or USB.
- Pricing: Varies based on media type and quantity. Photo digitizing typically starts around $0.50 per photo for larger quantities, with other media priced separately.
- Pros: Familiar brand, simple process, handles diverse media types.
- Cons: Can be more expensive than some competitors for large batches of photos. Turnaround time can vary.
- Best For: Those prioritizing a trusted brand name and a simple, comprehensive service for mixed media.
LegacyBox, a direct competitor, offers a similar service but often emphasizes a more hands-on, personalized approach.
- Overview: A popular mail-in service focused on preserving analog media by converting it to digital formats.
- Key Features: Accepts photos, VHS tapes, 8mm film, MiniDV, and more. Provides a pre-paid shipping kit and digital copies on USB drives or cloud.
- Pricing: Offers tiered pricing packages based on the number of items. Smallest kits start around $60 for 1-5 items, with larger kits offering better per-item value.
- Pros: Personalized guidance and tracking, handles a wide range of media. Known for their careful handling.
- Cons: Can be pricier than services focused solely on photos, especially for smaller orders. Turnaround time can be several weeks.
- Best For: Individuals with a mix of media types who appreciate a high level of service and detailed tracking.
DigMyPics and ScanMyPhotos: High-Volume and Budget-Friendly Options
DigMyPics often appeals to those with massive collections. They provide a system that aims for efficiency.
- Overview: A service known for handling large volumes of photos, offering competitive pricing for bulk orders.
- Key Features: Specializes in photo scanning, accepting prints, slides, and negatives. Offers various resolution options and digital delivery.
- Pricing: Known for being among the most affordable for high volumes, often under $0.20 per photo for large scans.
- Pros: Excellent value for bulk photo scanning, fast turnaround on large orders.
- Cons: Less focus on other media types like tapes or film. Customer service can be less personal for very large jobs.
- Best For: Anyone with thousands of prints looking for the most cost-effective solution.
ScanMyPhotos is another strong contender in the budget-friendly, high-volume space. They pride themselves on speed and accessibility.
- Overview: A long-standing service specializing in efficient and affordable photo digitizing.
- Key Features: Primarily focuses on photo prints, slides, and negatives. Offers express scanning services and various digital output options.
- Pricing: Very competitive, especially for bulk photo orders. You can find deals for as low as $0.10-$0.15 per photo during promotions.
- Pros: Extremely competitive pricing for photos, fast processing times.
- Cons: Primarily photo-focused; may not be the best choice for mixed media. Quality can vary slightly with the lowest-tier pricing.
- Best For: Budget-conscious individuals with extensive photo collections who need them digitized quickly.
These services take the burden off your shoulders, allowing you to reclaim your time and enjoy your rediscovered memories.
Enhancing Digitized Photos: AI Restoration and Damage Repair
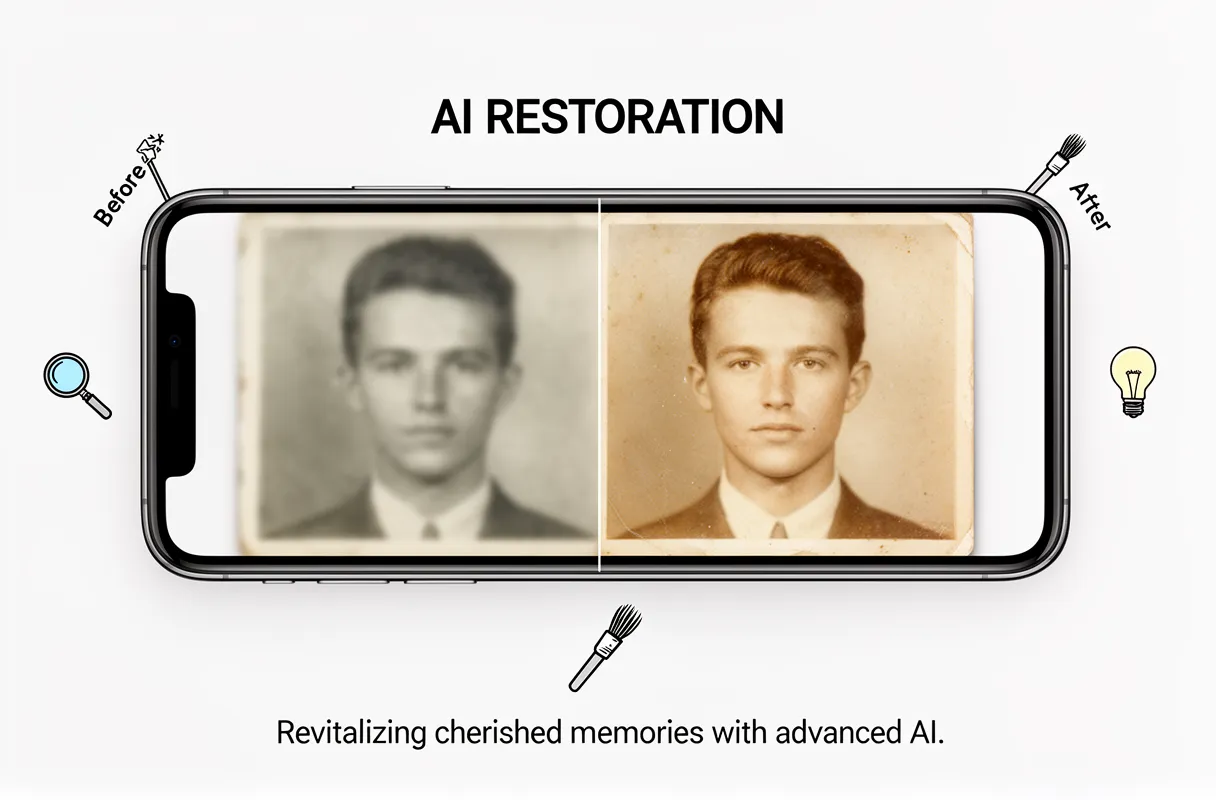
AI photo restoration tackles issues that traditional software struggles with. It can intelligently reconstruct missing details, sharpen blurred areas, and even colorize black and white images with remarkable accuracy. This means those faded portraits and scratched landscapes can look almost as good as new. For those specifically looking to rescue faded or blurry family pictures, AI offers powerful solutions that basic editing tools simply can't replicate.
Think of AI as an expert restorer. It analyzes the content of your photo, identifying areas of degradation. Then, it applies targeted fixes, like filling in cracks or correcting color loss, with a level of sophistication that mimics years of human skill. This process can significantly improve the emotional impact and legibility of your digitized heritage.
BringBack's AI-Powered Restoration Process
Think of AI as an expert restorer. It analyzes the content of your photo, identifying areas of degradation. Then, it applies targeted fixes, like filling in cracks or correcting color loss, with a level of sophistication that mimics years of human skill. This process can significantly improve the emotional impact and legibility of your digitized heritage.
BringBack AI tool streamlines this rescue mission. You simply scan your old photos with a phone app, capturing the best digital copy you can. Then, upload that scanned, damaged image directly to our platform.
Our AI analyzes the degradation in seconds. It intelligently repairs fading, scratches, and blur, bringing your precious memories back to life. You can even explore AI photo animation to add a magical touch.
You then review your revitalized photo or animated video and download it in high resolution. Sharing these revived treasures with loved ones becomes a source of pure joy.
Unlike subscription models, BringBack uses a one-time payment for credits that never expire. This makes restoring your cherished legacy both accessible and remarkably straightforward.
Restore Your Cherished Memories with BringBack:
- Scan Your Photo: Use your phone's camera to capture a clear digital image of your old photograph.
- Upload to BringBack: Submit your scanned, damaged photo to our AI tool.
- AI Restoration: Our intelligent system analyzes and repairs the image in seconds.
- Review & Download: See your restored photo or animated video, then download it in high resolution.
- Share Your Legacy: Relive and share your revitalized memories with family and friends.
Strategies for Scanning Badly Damaged Photos
Handling badly damaged or degraded photos requires a careful approach before and during scanning. Even with advanced tools, the initial scan quality dramatically impacts the final restoration.
For severely creased, torn, or brittle photos, gentle preparation is key. You might need to carefully flatten warped images under a heavy book for a few days, or use a soft brush to remove loose dust particles. Avoid any moisture or harsh chemicals.
When scanning, look for specific features on your scanner. Some higher-end models, like the Epson V600, offer Digital ICE technology. This feature automatically detects and corrects dust and scratches on film and prints during the scanning process. It's a significant help for photos with surface imperfections.
For images with significant fading, color shifts, or deep-seated damage that even scanner software can't fully address, advanced AI repair becomes indispensable. These tools can reconstruct missing pieces, sharpen blurred areas, and bring back lost color saturation in ways that manual editing cannot replicate effectively.
Scanning badly damaged photos often means accepting that some level of imperfection will remain digitally. The goal is to capture the best possible source material.
- Deep Creases: These can create permanent lines that scanners interpret as dark streaks.
- Mold or Water Stains: These often embed into the emulsion and are incredibly difficult to remove completely.
- Severe Fading: Colors can be lost to the point of near-irrelevance, requiring AI guesswork for accurate reconstruction.
These challenges highlight why post-scan AI enhancement is so critical for truly bringing cherished, degraded photos back to life.
Organize and Preserve Your Digital Photo Collection Long-Term
Deep creases and water stains on old photos mean your scanner might miss details or create unwanted artifacts. Because the AI restoration process works best with the clearest possible digital scan, even seemingly minor damage demands attention before uploading. Gentle handling and specific scanner settings (like Epson's Digital ICE for dust and scratches) make a significant difference here. For severely faded prints, consider AI's ability to intelligently guess missing color and detail, a task far beyond simple image adjustments.
Preserving your digitized photos long-term means treating them like precious artifacts. You need a clear plan for organization and protection. This ensures your family's visual history remains accessible for generations.
Here’s a concise checklist for effective long-term digital photo preservation:
- File Naming: Use a consistent format like
YYYY-MM-DD_Event_Description. - Metadata Tagging: Add dates, people, and locations to every image.
- Master Files: Save in a lossless format like TIFF.
- Working Copies: Create compressed JPGs for everyday use, scaled appropriately (e.g., 2160px on the short side at 300 DPI).
- Backup Strategy: Implement both cloud and local backup solutions.
This structured approach transforms a chaotic digital dump into a searchable, safe archive. It’s about making sure those rediscovered memories bring joy, not frustration, down the line.
Essential File Management for Digitized Collections
After scanning, your digital photo archive needs structure to remain useful. Proper file management prevents a chaotic digital dump and ensures your cherished memories are accessible for generations.
File Naming Conventions: Clarity Through Consistency
A clear file naming system is the bedrock of digital photo organization. We recommend a consistent format that includes key information at a glance.
- Suggested Naming Formats:
YYYY-MM-DD_Event_Description_SequenceNumber.ext(e.g.,1985-07-15_BeachTrip_Family_001.tif)YYYYMMDD_Location_People.ext(e.g.,19721101_GrandmasHouse_Cousins.jpg)
Choose one format and stick to it. This makes sorting and searching infinitely simpler than generic names like IMG_1234.jpg.
Enriching Files with Metadata
Beyond the filename, metadata adds critical layers of information for future discovery. Think of it as digital breadcrumbs leading you back to the memory.
- Essential Metadata:
- Dates: The exact date, or at least the year, of the photograph.
- People: Names of individuals present.
- Locations: Where the photo was taken.
- Events: Weddings, birthdays, vacations, etc.
Many photo viewing and management programs allow you to easily add and edit this data. For advanced archiving, consider software that supports IPTC or EXIF standards.
File Formats: Masters and Working Copies
To truly preserve your digitized memories, you need to think about file formats.
- Master Files: Always save your original scans in a lossless format like TIFF. This format retains all image data without compression, offering the highest quality for future edits or re-scanning.
- Working Copies: For everyday viewing, sharing, or web use, create compressed JPG files. Scale these appropriately (e.g., 2160 pixels on the short side at 300 DPI) to balance file size with good display quality.
This tiered approach ensures you have the archival-quality original and a practical version for immediate use. This structured method transforms a potentially overwhelming collection into a treasure trove, ready for rediscovery.
Robust Backup Solutions: Cloud vs. Local
Protecting your precious photo memories requires a two-pronged approach: cloud storage and local backups. We recommend using both to safeguard against data loss.
Cloud storage offers accessibility and off-site protection. Services like Google Photos provide generous free tiers and excellent searchability powered by AI. For larger collections or if you prefer more control, Dropbox or IDrive offer dedicated plans. These are fantastic for daily access and sharing.
Local backups provide a physical copy you control completely. An external hard drive is a straightforward option. For a truly resilient system, consider a Network Attached Storage (NAS) device. A NAS acts like your own private cloud, accessible from anywhere, giving you vast storage capacity and RAID configurations for redundancy.
Here’s a look at how they stack up:
| Feature | Cloud Storage (e.g., Google Photos, Dropbox) | External Hard Drive | NAS Device (e.g., Synology, QNAP) |
|---|---|---|---|
| Capacity | Varies by plan, often expandable | Fixed, choose size upfront | High, expandable, RAID options |
| Cost | Monthly/annual subscription | One-time purchase | Higher one-time purchase |
| Accessibility | Anywhere with internet | Direct connection required | Anywhere with setup, local network |
| Data Loss Risk | Low (provider managed) | Moderate (physical damage) | Low (with RAID configuration) |
| Redundancy | Built-in (provider's infrastructure) | None inherently | High (with multiple drives/RAID) |
Think of cloud storage as your primary vault and an external drive or NAS as your secure safe deposit box at home. We've found that combining these strategies ensures your digital legacy is irreplaceable.
Your Ultimate Guide to Scanning Old Photos for the Best Results
Deciding on the best way to digitize old photos involves balancing your time, budget, and desired quality. For those with a modest number of photos and a desire for hands-on control, a DIY scanning setup can be cost-effective. This approach allows you to scan at your own pace and choose the exact resolution.
However, the "scanning myth" is that resolution alone fixes everything. Blurry or damaged originals remain blurry and damaged. This is where post-scan enhancement becomes critical, transforming a digital copy into a revitalized memory.
For individuals seeking the highest quality or dealing with vast collections of family history, outsourcing to a professional service is often the wisest path. These services use specialized equipment and expertise to handle delicate originals and deliver superior results, especially for irreplaceable images.
Ultimately, a smart photo preservation strategy combines careful scanning with advanced digital restoration. We've found that even basic scanning advice needs to be paired with the understanding that the real magic happens when you can bring faded colors back to life and sharpen forgotten details.
Our Recommendation:
- DIY Scan: For under 500 photos, budget-conscious individuals, or those who enjoy the process. Focus on scanning at 600 DPI for good detail.
- Professional Scan: For over 500 photos, delicate or damaged originals, or when prioritizing convenience and professional quality. These services often include basic color correction.
- Always Enhance: Regardless of how you scan, plan for post-scan enhancement using tools like BringBack to truly revive your cherished images. This final step is what truly preserves your legacy.
Who Should DIY Scan and Who Should Outsource?
Whether you scan your precious photos yourself or hand them over to a professional service often hinges on a few key factors: your budget, the sheer volume of your collection, and your tolerance for time and complexity.
DIY Scanning is best for you if:
- You're on a tight budget and need to spread costs out over time.
- You have a smaller collection, say under 100 photos, or a few key albums.
- You want complete control over the scanning process, resolution, and organization.
- You enjoy hands-on projects and have patience for detail work.
- Your photos are mostly in good condition, requiring basic digitization.
Professional scanning services shine when the scale or condition of your photos presents significant challenges. If you're looking at hundreds or thousands of images, or if your originals are fragile, torn, or deeply faded, outsourcing becomes a practical necessity. These services offer speed and expertise for large batches. They also handle a wider range of media, from slides and negatives to different print sizes.
Ultimately, the sheer volume of your photos is the biggest tipping point. For a shoebox, DIY is fine. For a lifetime's worth, professional help saves sanity.
Even if you choose to scan yourself, remember that the quality of the scan is just the first step. We find that clients who scan at home often then use our tool to bring their images back to life.
The Power of Post-Scan Enhancement
Scanning your precious memories captures a digital snapshot, but it's often just the beginning of their revival. True photo enhancement after scanning happens when you move beyond simple digitization.
Think of it like this: a 1200 DPI scan is like getting a high-resolution blueprint of a damaged building. It shows every crack and imperfection. It doesn't magically fix the crumbling plaster or faded paint.
That's where advanced software steps in. Our AI photo restoration benefits are designed to do precisely that – to breathe life back into your faded, blurry, or damaged photographs. We focus on bringing out the hidden details, correcting colors, and sharpening images in ways a standard scan simply cannot achieve.
Beyond the Pixel: AI-Powered Restoration
Consider a cherished photo with a significant blur. Scanning at the highest resolution will give you a clearer digital image of that blur, but it won't make the subject sharp. Our BringBack features use intelligent algorithms to analyze and reconstruct the image. We can:
- Sharpen faces that are slightly out of focus.
- Restore faded colors to their original vibrancy.
- Remove scratches and tears that mar the image.
- Enhance contrast to bring out subtle details.
The true magic happens after the scan. It’s the post-processing that transforms a good digital copy into a stunning, revitalized memory.
We find that our clients are often amazed by the difference. They bring us scanned images they thought were beyond saving, and our AI tools reveal the joy and emotion that were almost lost to time. Scanning is essential, but post-scan enhancement is what makes your memories unforgettable.