To rescue your old 35mm slides, you must meticulously clean them, choose an appropriate scanning method—from a smartphone setup to a dedicated slide scanner—and then use software for digital capture, often followed by AI-powered restoration. This process can take a few hours to a full weekend depending on your collection size, and is moderately difficult initially.
What You Need:
- Your collection of 35mm slides (Kodachrome, Ektachrome).
- A computer (Windows or macOS).
- Your chosen scanning hardware (dedicated 35mm scanner like Plustek OpticFilm 8300i, a flatbed scanner with transparency adapter, or a smartphone with a uniform light source).
- Cleaning supplies (microfiber cloth, anti-static brush like Kinetronics Tiger Cloth or PEC-PADs).
- Scanning software (SilverFast, VueScan, or a dedicated app).
- Access to BringBack AI for restoration.
That shoebox of 1970s Kodachrome and Ektachrome slides sitting in the attic isn't getting any younger. Most professional services mean a 3-week wait and can be surprisingly expensive. DIY offers instant gratification, letting you capture quality ranging from a good 2000-3000 DPI up to 7200 DPI for professional archival prints.
By the end of this guide, you will have a high-fidelity digital collection of your precious memories, ready for sharing, advanced restoration with our BringBack AI tool, and secure archival.
Prerequisites for Home Slide Digitization
Before you even think about touching those cherished slides, gather these essentials. Having them ready streamlines the entire digitization process.
- Your 35mm Slides: Of course! Make sure they are easily accessible and organized by year or event if possible.
- A Capable Computer: You'll need a machine that can handle image files and the scanning software. A modern laptop or desktop with at least 8GB of RAM and sufficient hard drive space is ideal.
- Scanning Hardware: This is your core tool. Choose between a flatbed scanner with a slide adapter, a dedicated film scanner, or even a smartphone scanning app (though quality varies wildly).
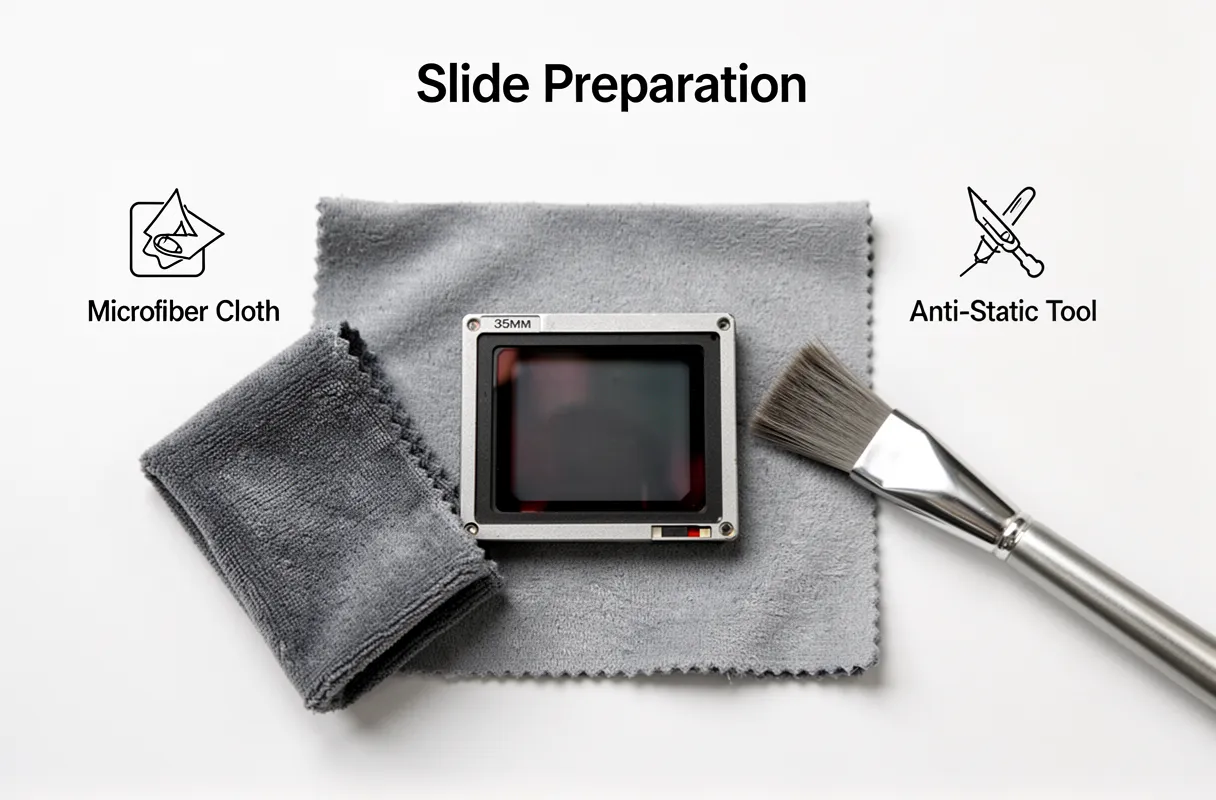
- Basic Cleaning Supplies: A few key items will keep your slides pristine before they hit the scanner. Think microfiber cloths and a gentle blower brush. (More on specific cleaning next time!)
- External Storage (Optional but Recommended): A dedicated external hard drive or cloud storage service ensures your digital memories are backed up and safe.
And remember, the magic happens when preparation meets patience.
Safe Cleaning Methods for Vintage 35mm Slides
Cleaning vintage 35mm slides before digitizing them demands a gentle touch to avoid damaging these precious memories. Proper cleaning ensures dust and grime don't translate into digital artifacts.
The safest and most effective method for cleaning 35mm slides involves dry dusting with specialized tools. Start by using a gentle blower brush to dislodge loose particles. For stubborn smudges, a microfiber cloth or specialized slide cleaning paper is essential.
Never use common household cleaning agents or even 70% isopropyl alcohol on older film types like Kodachrome or Ektachrome. These can cause irreversible color transfer on slides that are 60-70 years old. Always opt for photographic-specific cleaning solutions if absolutely necessary, but dry methods are preferred.
Consider using anti-static tools to prevent dust from re-settling. Products like the Kinetronics Tiger Cloth or PEC-PADs are designed to clean without leaving residue and actively repel dust.
It's critical to clean each slide immediately before scanning. Dust and oils from fingerprints can easily transfer and become permanent digital blemishes if not addressed just prior to digitization.
For more detailed guidance on the safest practices, consult resources that detail slide cleaning techniques. This step, while seemingly minor, significantly impacts the final clarity of your digitized images.
Comparison of Home Scanning Methods
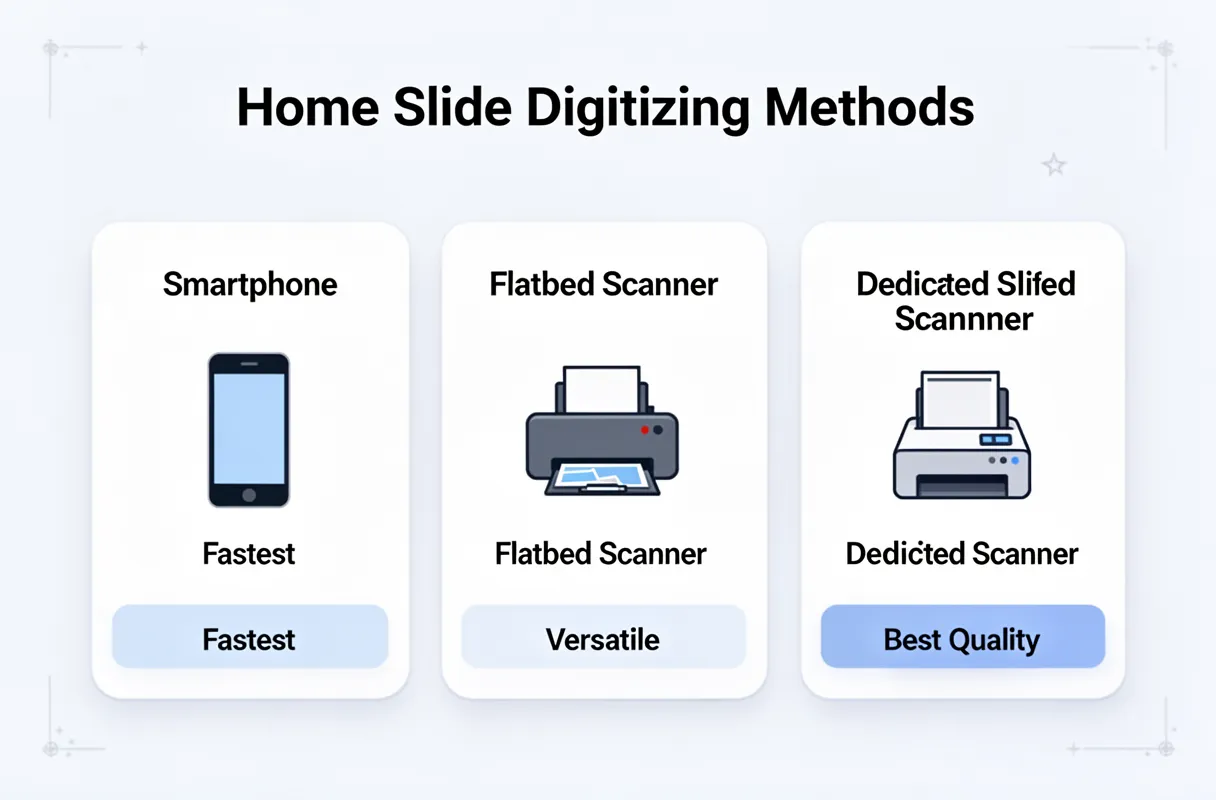
When you're ready to turn those dusty slides into digital memories, you've got a few paths to choose from, each with its own trade-offs. Understanding these options helps you pick the best slide to digital converter for your specific needs and budget.
The speed, quality, and cost vary wildly between the most common home scanning methods.
| Method | Speed | Image Quality | Cost | Best For |
|---|---|---|---|---|
| Smartphone Apps | Fastest (seconds per slide) | Highly Variable (dependent on app/light) | Free – $50 | Quick previews, sharing casual memories, very tight budgets |
| Flatbed Scanners | Slow to Moderate (minutes per slide) | Good (up to 2400-4800 DPI) | $100 – $500 | Mixed media, occasional slides, general photo digitization |
| Dedicated Slide Scanners | Moderate to Slow (minutes per slide) | Excellent (up to 7200 DPI, higher MP) | $200 – $1000+ | Preserving maximum detail, archival quality, large collections |
A smartphone app paired with a light source can give you a result in seconds, making it the fastest option for a quick peek. However, this speed often comes at the expense of detail.
Flatbed scanners offer a decent middle ground, capable of producing good quality scans suitable for most viewing needs. They are versatile, handling photos and documents alongside slides.
For those prioritizing the absolute best image fidelity, dedicated 35mm slide scanners are the top choice. Devices like the Plustek OpticFilm 8300i, for instance, can achieve 7200 DPI, rendering incredible detail compared to lower-end 'scan n go' models that might only manage 14-22 MP. This level of resolution is essential for archival purposes or if you plan to significantly enlarge your digitized images.
While dedicated scanners are pricier, often starting around $200 and going up to $1000 or more for professional models, the output quality is often worth the investment for preserving cherished family history. Our approach at BringBack prioritizes capturing that maximum detail, understanding that these images represent irreplaceable legacies.
Scanning Slides with Phone Apps and Light Boxes
Scanning slides with your phone can be a quick way to digitize your memories, but getting good results requires a bit of setup. We've found that a stable tripod, a consistent light source like a tablet or dedicated light box, and a way to keep the film perfectly flat are key.
You'll need to rig your phone to capture the slide precisely. A DIY slide holder made from cardboard or a 3D printed jig works wonders. This keeps the fragile film from curling and ensures the entire image is in focus.
The light source needs to be uniform. Placing your slide over a bright tablet screen displaying a white image can work in a pinch. For better, more even light, a dedicated LED light box is ideal. The goal is to avoid any hot spots or uneven illumination that would mar your scan.
Shooting in RAW format, if your phone allows, gives you the most flexibility later in post-processing. You'll want to capture the image with just enough light, ensuring you don't blow out highlights or crush shadows. We’ve seen many attempts that look washed out or too dark simply because the exposure wasn't dialed in correctly.
Post-processing is where the magic happens. Apps like Adobe Lightroom Mobile or even built-in photo editors allow you to crop, adjust exposure, and correct color casts. Think of it as your digital darkroom, allowing you to bring those cherished images back to life.
How to Use Dedicated 35mm Slide Scanners
Dedicated 35mm slide scanners offer a significant leap in quality for your 35mm slide conversion projects. Unlike smartphone methods, these devices are built specifically for the task, yielding superior detail and color accuracy. Devices like the Plustek OpticFilm series or the PowerSlideX Plus provide a more professional workflow, especially when tackling large collections.
Loading slides into these scanners is generally straightforward, designed for efficient batch processing. Most models utilize a tray or a feeder mechanism. You'll typically align your slides within the designated tray, ensuring the emulsion side (the duller side) faces the correct direction as per the scanner's instructions.
For high-volume scanning, such as hundreds of slides, the key is consistent loading. Take your time to ensure each slide sits correctly in the tray. A misaligned slide can cause scanning errors or even damage the film. This meticulous approach upfront saves considerable time during post-processing.
Once loaded, the scanner and its accompanying software, like SilverFast or the manufacturer's utility, take over. They handle the digitization process, often allowing for batch settings to be applied across all images. This automation is where dedicated scanners truly shine, turning a tedious task into a manageable process. Remember, the Plustek OpticFilm 8300i is a prime example, offering 7200 DPI for exceptional detail, a far cry from the limited resolution of some basic scanners.
Steps for Efficient High Volume Batch Scanning
To process hundreds, even thousands, of slides efficiently, a methodical approach is key. It's not about speed alone, but about a streamlined workflow that minimizes errors and maximizes throughput.
1. Organize Your Slides
First, gather all your slides and sort them logically. This could be by year, event, or even by family member. Having them in order from the start saves immense time later when you’re trying to locate specific images.
2. Batch Pre-Cleaning
Do not try to clean each slide individually right before scanning. Instead, take them in small batches – say, 10 to 20 at a time. Use a blower brush or canned air to remove loose dust and debris. This prevents dust from spreading and contaminating your scanning surface or the scanner itself.
3. Leverage Software Presets
Once you've loaded your slides into the scanner's tray, your scanning software (like SilverFast or VueScan, which we'll cover more deeply later) is your best friend. Create and save presets for common slide types and desired resolutions. This automates tasks like auto-cropping, auto-color correction, and basic dust removal, significantly speeding up the process.
4. Initial Verification Run
Before letting the software run wild on hundreds of slides, scan the first five to ten slides with extra attention. Check for common issues like focus problems, color casts, or unexpected artifacts. If these initial scans look good, you can be confident in letting the batch process continue. If not, adjust your presets and rescan. This small step prevents you from having to re-scan hundreds of images later.
Configuring Software for Archival Resolution
Configuring your scanning software is where you truly set the stage for archival quality. It’s not just about hitting "scan"; it's about telling the software precisely how to capture every nuance.
3. Setting the Resolution: DPI Matters
For archival purposes, you’ll want to capture the maximum detail your slides offer. This means setting the right Dots Per Inch (DPI).
- 2000-3000 DPI: This range is generally sufficient for most archival needs, providing excellent detail for digital viewing and standard print sizes.
- 7200 DPI: You’ll want to push to this higher resolution if you plan on making very large professional prints or if you know the original slide has exceptional detail you want to preserve for future, unforeseen uses. Higher DPI means larger file sizes, so plan your storage accordingly.
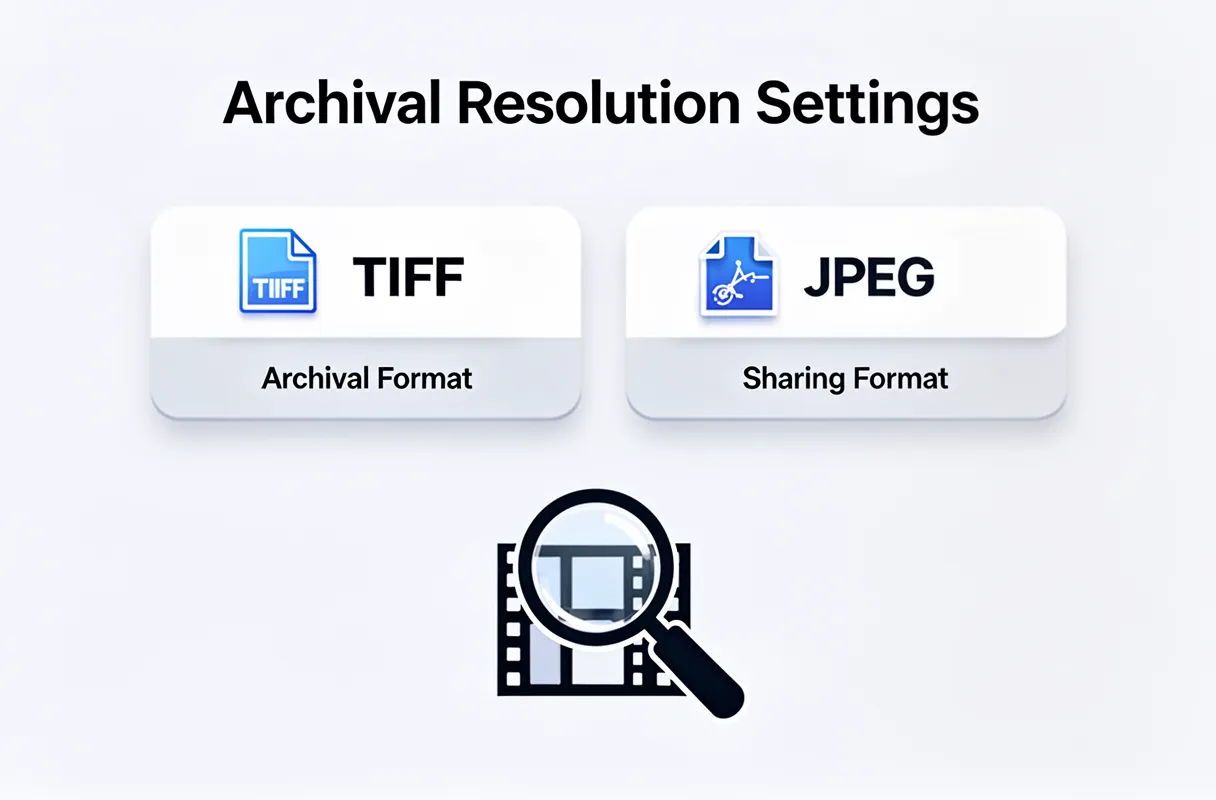
4. Choosing the Right File Format
The file format you select dictates how you can use and edit your scans long-term.
- TIFF (.tif) or DNG (.dng): These are lossless formats. Think of them as the uncompressed master recordings of your photos.
- TIFF: Widely compatible, great for editing, but files can be quite large.
- DNG (Digital Negative): Adobe's open-source raw format. It's also lossless, often smaller than TIFF, and contains all the metadata. Many professional editors work natively with DNG.
- Use JPEGs for: Immediate sharing with family or previews.
- Avoid JPEGs for: Your primary archival copy if you ever plan to do significant editing.
We always recommend saving your master archival copies as TIFF or DNG files. You can always create JPEGs from these later.
5. Software Presets and Configuration
When using scanning software like SilverFast or VueScan, you'll encounter numerous settings. Don't be intimidated.
- Scan Driver Settings: This is where you’ll set the DPI and file format.
- Color & Tone Controls: Many programs offer auto-correction features. While convenient, for archival scans, we prefer to have fine-grained manual control over color balance and exposure. This ensures we capture the original intent of the photographer.
- Dust and Scratch Removal: Be cautious with these. While tempting, overly aggressive settings can sometimes remove genuine detail or create artificial artifacts. Start with a low setting or even turn it off and rely on post-processing if needed. We often find that cleaning the slides physically before scanning yields better results than relying solely on software correction.
And that’s how you get your software set up to capture the magic of your memories for years to come.
Troubleshooting Common Image Quality Issues
8. Troubleshooting Common Image Quality Issues
When scanning, you might run into a few snags, but don't worry. We've seen these before, and the fixes are usually straightforward.
The key to a great scan is a clean source and appropriate settings.
Common Issues and Their Fixes
| Problem | Cause | Solution |
|---|---|---|
| Color Casts | Inaccurate color balance during scanning. | Use software auto-leveling features. Most scanning software has an "Auto Levels," "Auto Color," or "Auto White Balance" function. This is a good starting point. If that's not enough, manually adjust white balance using a neutral gray area in the image. |
| Blurriness | Out of focus, or the slide/photo isn't flat. | Check the scanner's focus. Ensure the film holder or scanner bed is clean and the media is seated correctly. For slides, verify they are perfectly flat within their mounts; sometimes a slightly warped slide causes focus issues. |
| Digital Artifacts | Dust on the scanner's glass or sensor. | Clean the scanner's glass and sensor. Use a lint-free cloth and an approved glass cleaner. Even a tiny speck can create noticeable lines or dots. Perform a test scan on a blank white document to check for debris before scanning your precious originals. |
| Graininess | High ISO film or aggressive sharpening. | This is often inherent to the original film. While some software can attempt to reduce grain, overdoing it can make the image look plasticky. We recommend a light touch, or accept that a bit of film grain adds to its character. |
| Loss of Detail | Scanning at too low a resolution. | Increase your DPI setting. For archival purposes, we recommend 2000-3000 DPI for prints up to 8×10 inches. If you plan on making large professional prints, consider 7200 DPI. Always save in TIFF or DNG format for maximum editing flexibility. |
Sometimes, the issue isn't with the scanner at all, but with the physical condition of the slide or photo itself. Things like scratches or minor damage are best addressed during the scanning process if possible, but extensive restoration often requires more advanced tools.
Restoring Faded Slides with BringBack AI
Faded colors and minor imperfections on old slides don't mean the memory is lost. BringBack AI offers a straightforward way to bring those cherished images back to life.
Simply upload your scanned, faded slide to our platform. Our advanced AI then gets to work, meticulously analyzing the image for color degradation and damage. It applies precise, targeted repairs to restore vibrancy and clarity in mere seconds.
You can then preview your revitalized photo or even see it transformed into a short animated video. Download your high-resolution, restored memories and start sharing them with family and friends, reliving those precious moments. This makes digitizing old slides a truly rewarding process.
Organizing and Naming Digitized Slide Collections
Keeping your digitized slides organized and easily searchable means more than just having them on a hard drive. A good system ensures you can find that specific memory from decades ago in moments, rather than digging through thousands of files.
Folder Structure: The Foundation of Order
A logical folder hierarchy is your first line of defense against digital clutter. We’ve found a simple Year-Event structure works best for most family archives.
- Year: Start with the broadest category – the year the photos were taken.
- Event: Within each year, create subfolders for specific events or themes. Think "Summer Vacation," "Christmas 1988," or "High School Graduation." This makes browsing intuitive.
This simple approach ensures that when you're looking for photos from, say, your childhood, you can quickly jump to the correct decade and then pinpoint the specific occasion.
Naming Convention: Making Each File Findable
Beyond folders, the filename itself is a powerful tool. A consistent naming convention transforms a jumble of digital files into an accessible archive.
A solid convention includes the Year, a brief Description, and a Sequential Number.
Example: 1974_Summer_Vacation_001.jpg
1974: The year is always first, making chronological sorting automatic.Summer_Vacation: A descriptive phrase tells you what the photos are about at a glance. Use underscores to separate words; spaces can sometimes cause issues with older software.001: A three-digit sequential number ensures uniqueness within that event and makes sure files stay in order, even if you add more later.
This systematic approach means you’ll never have to open 50 blurry photos just to find the one of Aunt Carol at the beach. You'll know exactly where to look.
Data Backup Strategies for Digital Archives
Digital files, unlike their physical counterparts, are surprisingly fragile. A dropped hard drive, a corrupted download, or even a simple file system error can wipe out precious memories in an instant. Because of this, a solid backup strategy isn't just good practice; it's essential for safeguarding your digital legacy.
The widely adopted 3-2-1 backup rule provides a simple yet powerful framework to ensure your digitized archives are safe. This strategy means you’ll have three copies of your data, stored on two different types of media, with one copy kept offsite.
Here's why this layered approach works:
- Three Copies: Having multiple copies significantly reduces the risk of total data loss. If one or even two copies become inaccessible, you still have a fallback.
- Two Different Media Types: Storing data on disparate media (e.g., an external hard drive and cloud storage) protects against failures specific to one technology. For instance, a fire might destroy your external drive, but your cloud backup remains intact.
- One Offsite Copy: This is the critical safeguard against localized disasters like fire, theft, or flood. Keeping a copy in the cloud or at a different physical location means your memories are safe even if your home is affected.
Digital files are remarkably easy to lose if not managed correctly. Without a robust backup plan, your painstakingly digitized slides and photos could vanish with a single technical glitch.
The bottom line: Treat your digital memories like gold. Protect them with redundancy.